Monday, November 16, 2009
Late Fall Update
This is going to be a semi long post because I have not updated since the install. I sprayed some high temp stove paint on the liner so it is not so noticeable. This fall has been extremely mild. I fired it up several times In October but the first half of November I didn't have to touch it. The first 5-10 times I burned the smell/smoke from the new stove pain curring was terrible. Make sure your first 5 fires are when you can have all your windows open and not have to be in the same room as it. I don't know how toxic that is but it was terrible. My draft is sufficient with the 14-15ft chimney. It will blow smoke out a bit if you open the stove door fast but as long as it is done slowly no smoke will come in. When you get a good fire going I will still have coals left 7-8 hours later, there is not enough to get a fire going or anything but they are there. The stove will usually still be around 150-200 degrees also. I expected to have to build a new fire every day and it looks like I will have to. I could probably get something going with some really small kindling. I have played around with the upside down fire building method. It does work but it takes it a while to get going. I have just recently started using firestarters. I bought the big starters and then chop them up into roughly 1x1 inch chunks. I use 2 pieces about 6 inches apart and it works great. I can get the stove up to 400 degrees in about 25 minutes( that's the minimum temperature that the stove starts operating efficiently). To get it up to speed this quick I use lots of little chunk of wood, roughly 1x1x3-8 inches. I fill the stove 3/4 full of this kind of stuff with some smaller kindling right over the fire starters. Then I light it and leave the door cracked about 3/4 of an inch. When the door is cracked it is like putting a fan on it. I will try to get some video up in the next couple days as long as the weather stays cool.
Monday, August 3, 2009
Chimney is DONE!


My chimney came in on friday. I was actually out of town and did not expect it so soon so it sat on my front porch all weekend. I am glad no one tried to run off with my $700 chimney liner. I ordered it from rockford. I would recommend them. the shipping was amazingly fast. I tackled the project by myself. It definitely would have been easier with a second set of hands but I am in a hurry to get this wrapped up. The video on youtube makes this look a little easier than it is, but it all worked out in the end. Just unrolling the chimney liner by myself was a chore. I wanted to get it as straight as possible before installing the insulation kit on it. Once I got it mostly unrolled I had to get all the factory oil off of it. I was affraid the spray adhesive would not stick if I didn't. Then I cut the insulation to about 172 inches so it would stop right before I got the the damper opening. I knew there was no way the liner and the insulation would fit through the hole. I did not attach the bottom termination like the video (by the way I went the applaince connector not the T). shows until I had the liner pulled through. That just looked like a good way to ding up an expensive part. once I had the insulation installed, taped and the mesh wrap secure I cut down a 2x4 to fit inside the bottom end of the liner. I also driller a 1 inch hole through the board. then I ran a roap with a knot in the end through the hole and used 4 screws to attach the 2x4 in the bottom. This gave me a way to get the liner on the roof bymyself and pull down on the liner if it got stuck in the chimney. I lugged the liner to the back yard then through the rope onto the roof. Then I climbed up on the roof and used the rope to pull the liner up. The liner and insulation is not super heavy. I would guess around 50-75 pounds but its still pretty akward. I dragged it over the chimney Then through the rope down the chimney. Then I huffed and puffed and chiggled and shoved until I got it through the top portion of my chimney extension and started down the brick part of the chimney. I actually got it all the way down in about 5 minutes. It got stuck a couple times but I never had to go down and pull on the rope. I got it all the way to the damper opening with out having to go down. then is just needed a small tug down there and it was through. I stuck the insulation about 4 inches from the top of the liner so I could just pull it all the way down and cut off the excess from the bottom rather than the top. It actually worked well doing it this way. I hopped back on the roof and shoved it the rest of the way through. Then I got the top part of my chimney extension and attached it. and tightened the hose clamp around the liner. it all went pretty smooth. Then I climbed down and figured where I needed to cut the liner off. I used a grinder with the cutting wheel. It blasted right through it then I attached the appliance connector at the end. Then I went back up to the roof and smothered all the joints in roof tar/plastic stuff. I don't want to have to deal with a leak. I took me all day but I got it done. Now I can honestly say I am ready to burn in this if I had to. I still need to make a damper block off plate and trim around the hearth but I am not giong to get in a rush to do that.

Wednesday, July 29, 2009
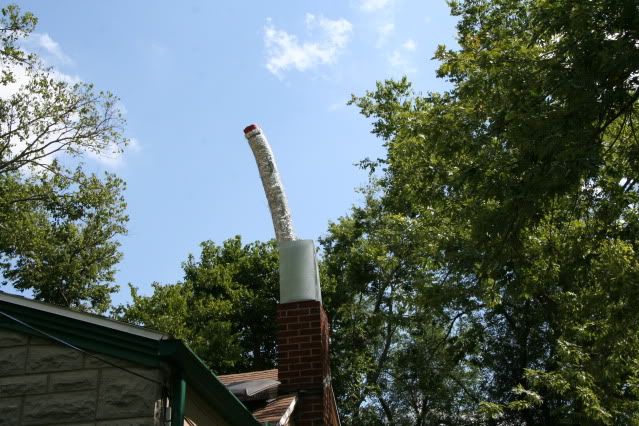
Redneck chimney extension
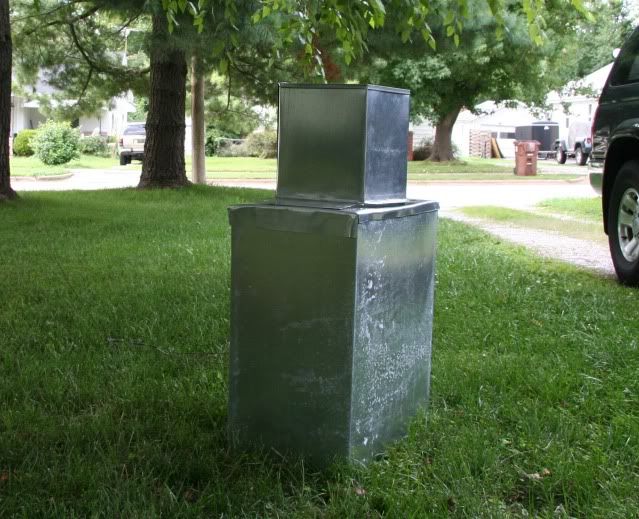
I have been trying to figure out a free way to make my chimney taller. I was given some return air ducting a while back and it is going to get the job. I have been reworking it a bit. It wont be pretty but it should be fine for holding the liner up. The chimney is on the less traveled side of the house too so it won't get much attention. I also got the liner ordered today. I was torn between Running a T or just running the liner right into the back of the stove. I decided to go with out the T. I can always add one later and this will save me 200 bucks for now. It should also eliminate a few more places for the draft to suck air other than the stove, giving me more reliability hopefully.
Tuesday, July 28, 2009
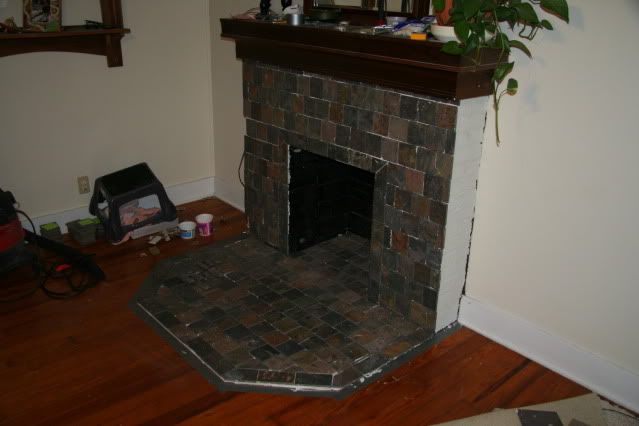
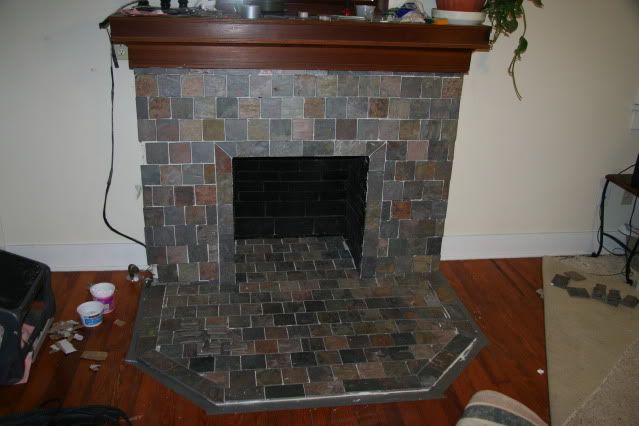
Grout is done
I had to go out of town for a week but my super awesome wife finished up the grout for me.
Friday, July 17, 2009

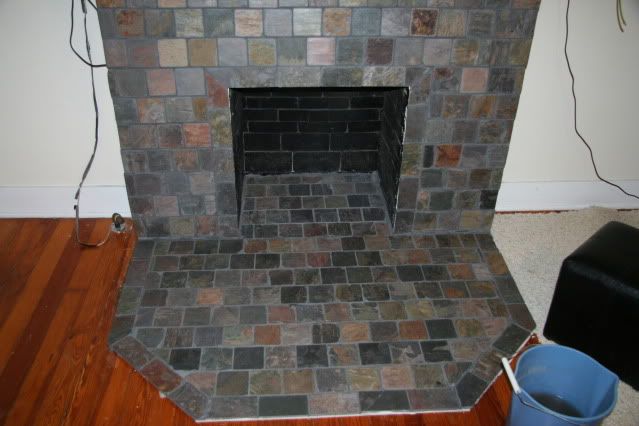
Tile is almost all down.
We had another work evening after work. We put in another 5-6 hours. We got all the front done except 2 little pieces on the the left. We will finish up the sides tonight. They should be pretty easy. There are no real small cuts to make and they should be the same all the way up. Then we may start the grout. It sounds like slate is a bit harder to grout than other tile...figures. We should be able to unload the stove tonight too.
Thursday, July 16, 2009
Stove is here.
Well we went to pick up the stove yesterday. I took a phone pic but I guess I didn't get it saved. We put it in the back of the 4runner with a forklift, and just scooted it the rest of the way. It is still setting in the back. I am waiting for my Brother in law to come over and help me unload it. More pics then.
Wednesday, July 15, 2009
The eternal tiling project...
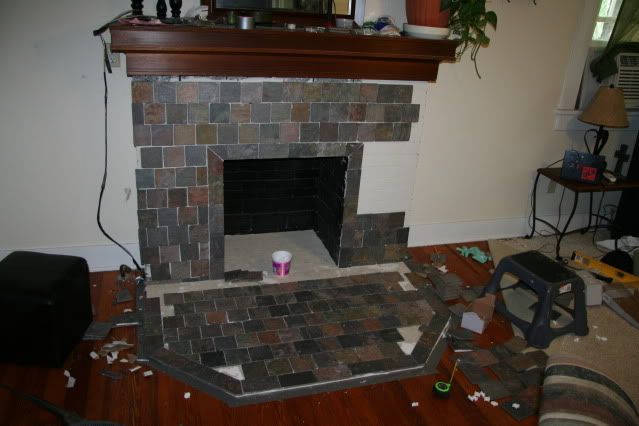
This tiling project is taking much much much longer than I ever expected. We have spent about 12-15 hours on this so far. The first time we got started we did not realize the slate tiles were all a different size. So we had to take them all down. The next day we sorted them into sizes so that helped a bunch. Then there is the problem of cutting these. The slate just wants to split. So cutting all these little tiny pieces is almost impossible. I am using a grinder with a hitachi wet/dry diamond blade. It cuts fine but the tile just splits. So for each small piece, you have to cut about 3 tiles until you get a piece of slate that is strong enough. Its coming though. I am hoping we can finish tomorrow but I wont put any money on it. Then hopefully we can grout on friday. The stove shop called and said the stove is in. We will be picking that up today. I leave on monday for the Show for work so I really want to have the tile done and the stove setting in place so all I have to do is the chimney when I get back. I only have a week and a half to get the chimney together before the academy starts and I don't want this project looming over my head.
Wednesday, July 8, 2009
Everything is Rolling Now.


Like I said yesterday the wife pitched in picked up the tile. I found it at Creative Associates. I was looking for some 6x6 darker colored natural looking tile. I had looked at lowes and home depot but was not to thrilled with the prices. I went to Creative Associates and I found some slate 4x4 and 3x6 tile for 1.75 a sq foot. I thought that was pretty good especially for slate. I sent my wife out to check it out and she approved and bought it. I had the hardibacker ready to go so I mixed up some thinset and stuck the small piece down inside the fire place. It went pretty smooth but I used more thinset that I thought I would have to. My wife had taped off around the big piece of hardibacker so we dumped the rest of the thinset out and she set to work spreading it out while I went and mixed some more up. I accidentally mixed up way to much this time though. We finished spreading it out for the big piece of hardibacker then laid it down. I put in a bunch of screws for the part that was on the wood. I think it should stay no problem. Since we had gobs of thinset left, I decided we could use it to fill some of the joints in the brick. Hopefully it will allow us to use less when we go to lay the tile and I wont have to buy another bag of the stuff. After that job we un-boxed about 3/4 of the tile. it was really dusty so we thought we should wash it down a bit bit so the dust didn't prevent it from sticking. I am not sure if it will make a difference or not but it couldn't hurt.
Monday, July 6, 2009
Another good day
I got a few more little things done yesterday. The first thing I did was crawl up on the roof and got some more measurements.That is for a different post though. I cut the corners of the hardibacker and got the final trimming done so it is ready to be stuck down. I went by the tile store and scoped things out. My super awesome wife picked the slate tile up today. I also got the stove ordered. It should be here next week so I want to have the tile done by then.
Friday, July 3, 2009
More Progress
I actually got a lot done today. I finished stripping the paint off the fireplace and then I got the hardibacker cut pretty close to size. The small back piece is good. I still need to decide on my exact dimensions of the large front piece though. I found out the manual was a bit misleading when it came to the size of the jotul f100. Apparently the legs on the stove are actually 16 inches apart. That is going to put me at 34 inches out from the front of the fire place. The peice of hardibacker comes at in at 36. So is it worth cutting those 2 inches out? Also will it look better to angle the corners of the hearth or leave it straight? I also need to decide if what tile to go with. That is going to have an impact on how big the angles are if I do go that route. Decisions... diecisions...
Tuesday, June 30, 2009
Stripping paint off the brick
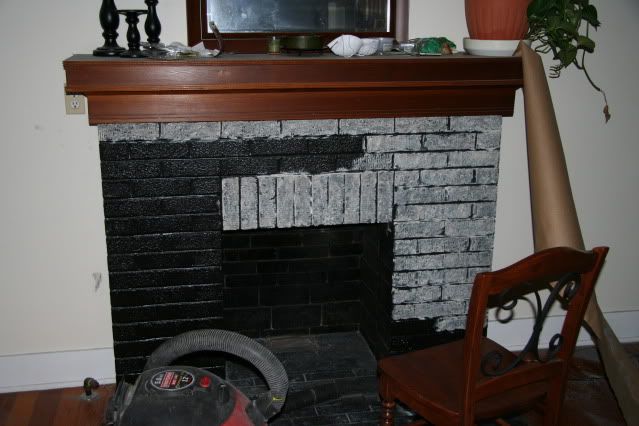
I started to strip the paint off the brick fire place yesterday. It is taking a bit longer than I thought but the grinder with the wire wheel is doing a pretty good job. It is also making a big mess. I hope to finish up between today and tomorrow. I also ran by the stove store. The guy seems nice but his prices are a lot more than what I want to spend. The Jotul f-100 is $1299 from him. I can drive about 30 minutes out by my parents house and pick up the stove for $90 cheaper. His chimney liner is about 400 more than what I can get it for online too. I am debating on asking him if he will match that price on the stove or just go pick it up from the other guy.
Thursday, June 25, 2009
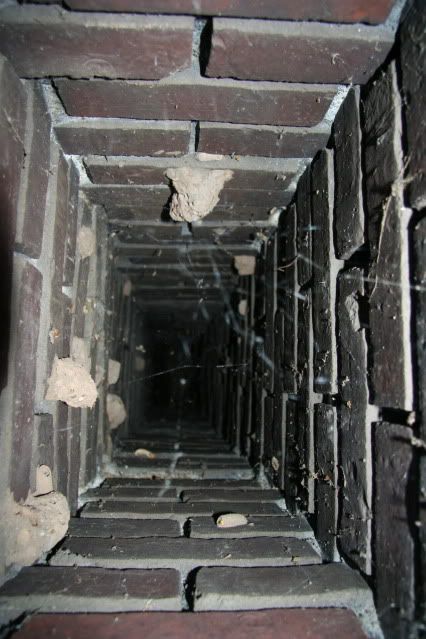
Chimney Thoughts

I have posted on hearth.com and emailed chimneylinerinc.com about my liner options. I took a few measurements last night. Here are a few pics of what I have going on and my options for the liner termination. I am afraid the T option at the top may angel up. More research I guess and more measuring.
UPDATE: looks like the T is the way to go. chimneylinerinc.com has a smaller T and a long snout I can use if I need it. I will get the stove here and then work on the chimney.
Sunday, June 21, 2009
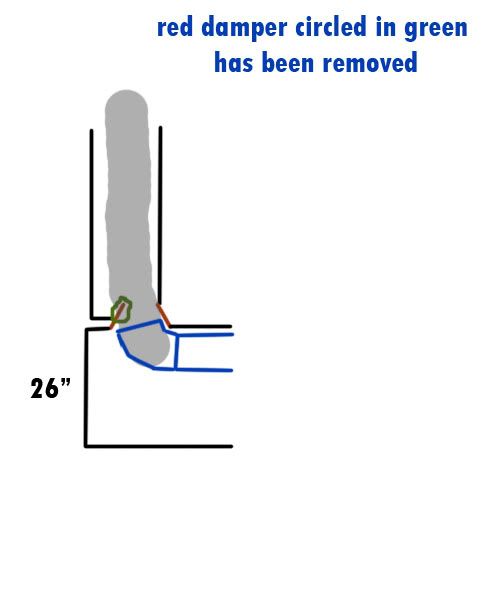
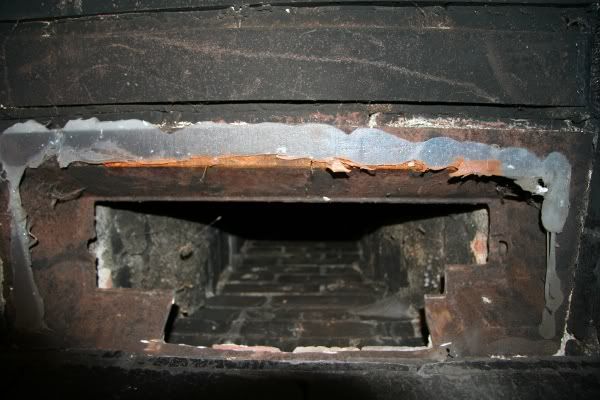
Damper Removal

I finished getting the damper cut out today. I ran into a small problem with my grinder and the cutting wheel, but I got the part I needed and got it cut out of there. I definitely looked like the guys in Marry Poppins . I also found out my shop vac bag was the not fitting right and blew dust all over the house. So I still have a HUGE mess to clean up. The damper flap cracked in half while I was trying to cut it with a sawzall. Then I used the grinder with a cutting wheel to take care of the rest. I got the paint can out though so I think I should be pretty close to the width I need to get the chimney liner routed through there. I will get some final measurements once the shop vac is working and I can get everything cleaned up. I will get some more pics up after that.
Wednesday, June 17, 2009
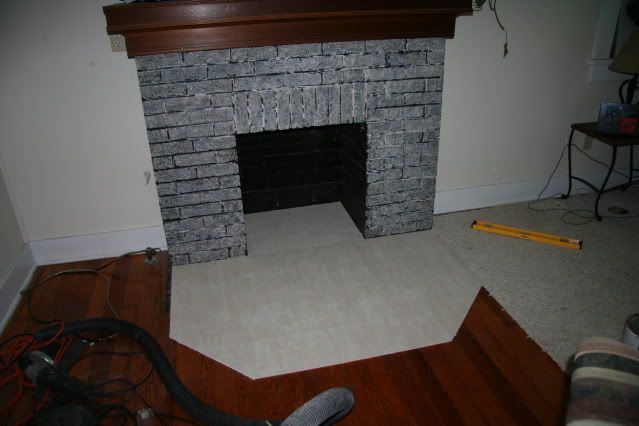
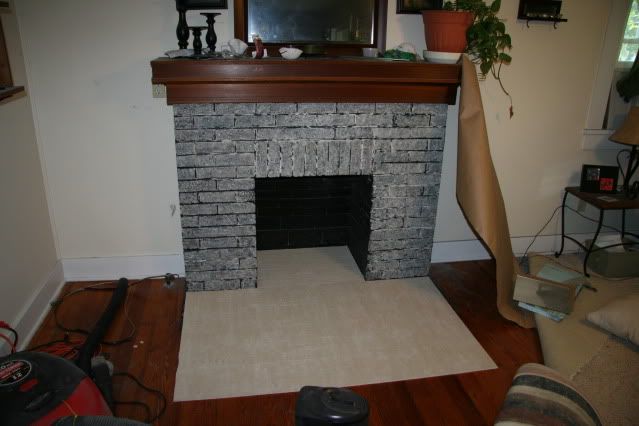
The Fireplace
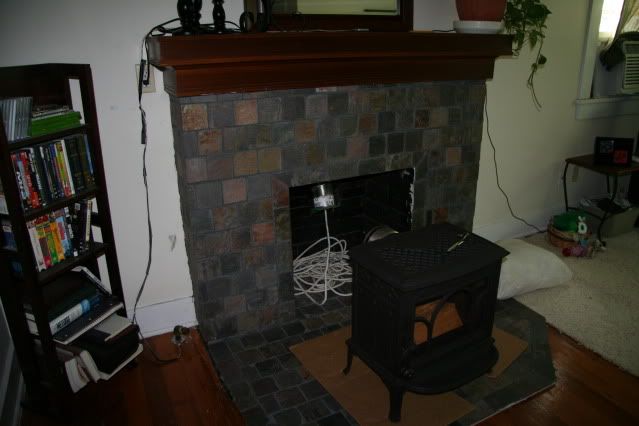
 Here is the little fire place we have to work with.
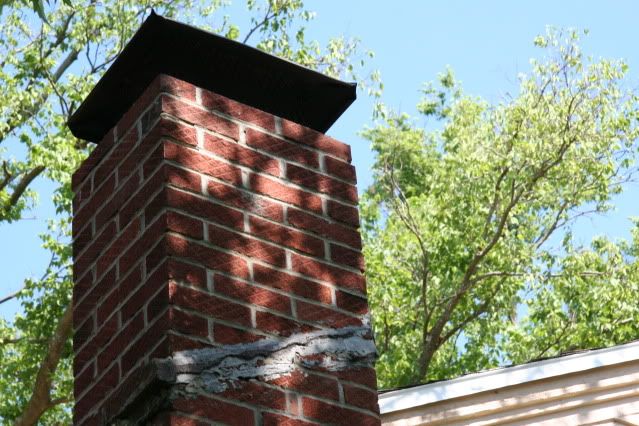
width: 26”
height:27”
depth: 18”
hearth level with floor 15”
The first problem that we will have to address is the short hearth. A hearth should be at least 16-18 inches in front of the glass of the stove. The back of our Jotul f100 is going to sit basically even with the front of the fireplace. The f 100 is about 13 inches deep so our new hearth is going to have to extend at least 31". We will probably just make it 34-36" though to be safe. The next problem we are going to run into is the fireplace damper. The opening is roughly 4-5 inches. This jotul stove requires a 6 inch vent pipe so I am going to have to come up with a couple more inches to make it work. That means I am going to have to get out the sawzall and the grinder and
 start hacking away at the damper. I should be pretty close at that point. I hope to be able to start on that tonight. After that I have a straight shot up a short unlined chimney. I will take care of the unlined part with a stainless steel flex liner and an insulation wrap. The short part could get complicated. The chimney is what makes a stove work properly. A short or cold chimney can make a great stove worthless. Right now I am guessing I have about 12 feet of chimney. I wont know for sure until I get the damper out though. That is definitely on the short side of things but I might just be able to pull it off since the liner will be wrapped all the way up. That should keep the chimney nice and warm so hopefully it will work. If not I will have to come up with some sort of hack job to increase height of the chimney.
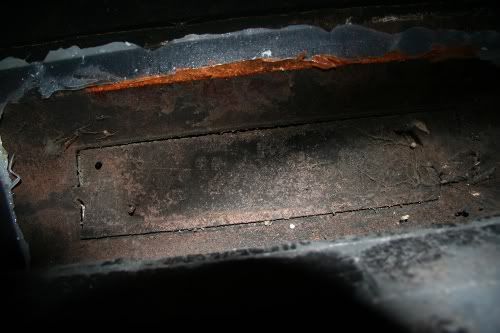
The Setup

This is a basic floor plan of the area we plan to heat with this stove. The total area is just under 650 square feet. Most stove manufactures over estimate the heating ability of their stoves, but as long as the Jøtul F 100 Nordic can do 65% of the stated 1000 feet we should be fine.
The Idea
My wife and I have lived in this little old house for about 3 years now. The house has a floor furnace right now for its primary source of heat. It actually does a pretty good job but it costs a fortune to run it since its gas. Our last utility bill was $76 for everything. In the dead of winter last year we got them up to $198. We even use a programmable thermostat. The temperature of the house is setting at around 55 from 11pm to 11am and then again from 1pm to 4pm. When it is running we leave it set at 68, but with our drafty old house the other side of the room is probably setting at about 65 or less. We have decided that a wood stove should be able to take care of both these problems. A warmer house (witch also means a happier wife) and also a cheaper utility bill. I am hoping to save a minimum of $200 a winter, or roughly $50 for the 4 coldest months. Living in the ozarks gives us access to plenty of good hard oak to burn. All it costs is some manual labor on our part.
Subscribe to:
Posts (Atom)